Ubiquiti UniFi in the home
Posted on 26 February 2017
11 minute read
Although I hadn’t heard of them before, I’d never thought to use a setup like Ubiquiti UniFi in the home. Initially I thought it might be overkill, despite many things connected to my home network. After poor wifi performance in some areas of the house, and some good reviews from people on Twitter, I decided to have a look.
I also wanted to replace the CCTV system at home as the system I had originally, ultimately had potential issues with the Mirai IoT malware.
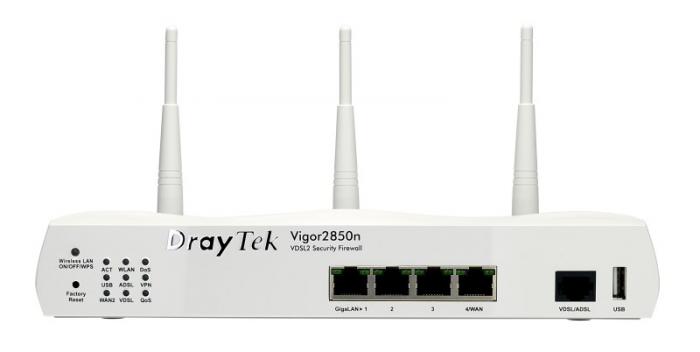
My original core network simply contained a DrayTek Vigor 2850n router and a few Netgear gigabit switches.
The new gear
UniFi Security Gateway (USG)
The UniFi Security Gateway (USG) is the firewall / router and what stands between your internal network (LAN) and your external internet connection (WAN) provided by your ISP.
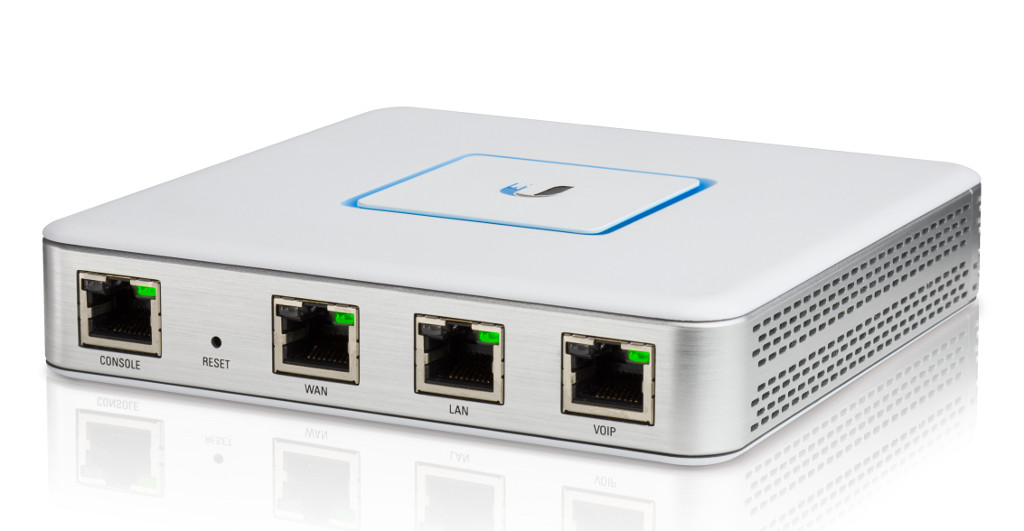
This comes equipped with a config console port, WAN port that connects to your modem and a LAN port that connects to the rest of your network (probably to a switch). It also comes with a VoIP port and this can now be configured as a second WAN port.
UniFi Switch 8 (PoE 150w)
The next part of the jigsaw is the switch. I knew I needed to power my CCTV cameras (2 at this point) and a wireless access point and wanted to do this as cleanly as possible, so opted for the UniFi 8 port PoE 150w switch as this will be more than enough to power these.
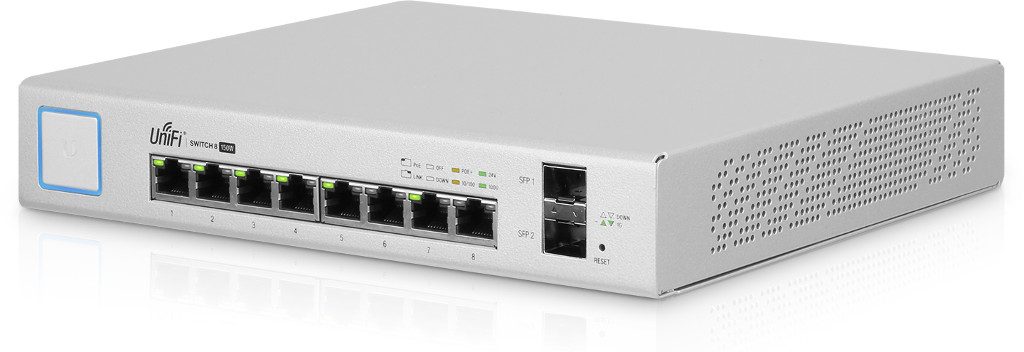
This is a great piece of kit that provides you with a lot of configuration and control over each port individually. You can see exactly what clients are connected to what port and will also provide Deep Packet Inspection (DPI) if you enable it within the controller.
It also comes with 2 SFP ports, but I doubt very much these would be used with a home setup, generally, although can be used like any RJ45 ethernet port with an SFP transceiver.
Connected to this I have a mix of items, some Ubiquiti, some not (yet?). These include:
UniFi Cloud Key
The UniFi Cloud Key is where the UniFi Controller Software resides.
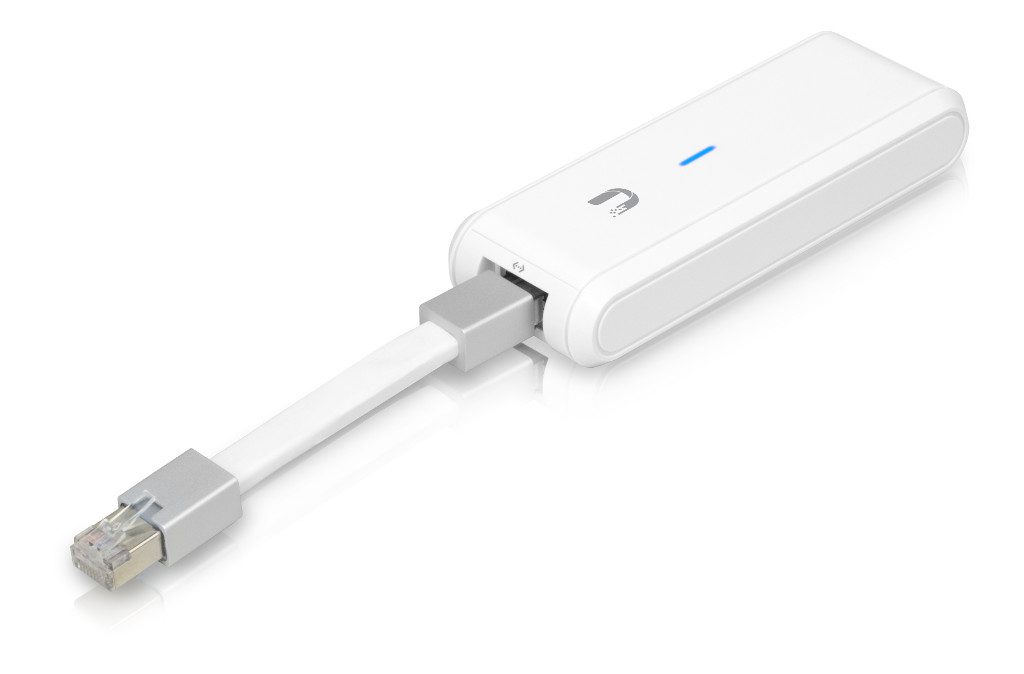
This runs an instance of Debian with the controller software pre-installed. You could use a Raspberry Pi instead, but despite having multiple of these dotted around my house as media streaming devices, the cost of this (£50 at time of writing this post) compared to the cost of the dedicated Cloud Key, and the fact the Cloud Key can be powered over PoE, it was just as cost effective to get this.
This is what connects all of the UniFi devices together and provides the very nicely laid out controller web UI.
UniFi AP AC Pro
To provide the wireless aspect of the network, I went for a UniFi AP AC Pro. Although this does cover most of the house, the speed upstairs in the master bedroom is a little weaker, so I plan to get 2 more, one for upstairs and one to go in the ground floor extension.
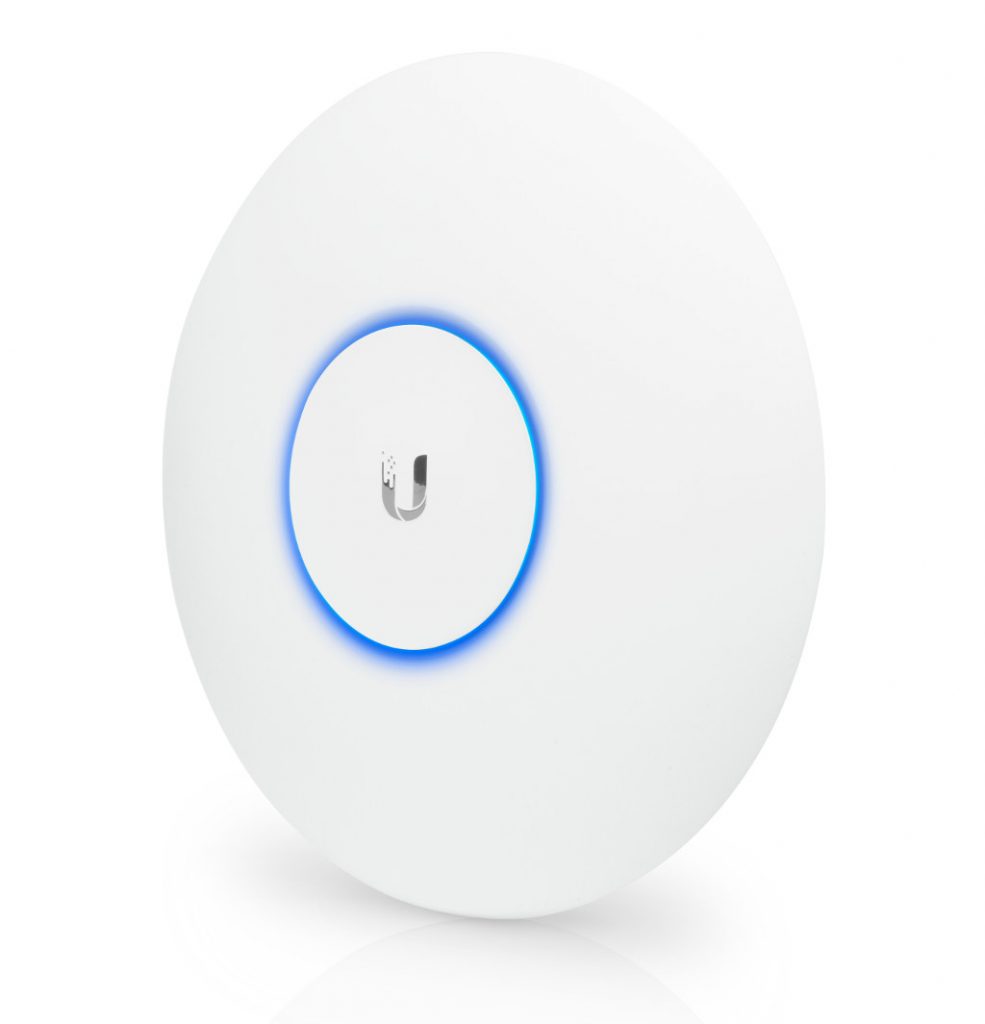
This is an 802.11AC Access Point and can deliver up to 1,300Mbps of throughput on the 5g wavelength.
UniFi Video Camera G3
This is where my network will differ to many other home networks, but I wanted some decent CCTV cameras and decided whilst I was dealing with Ubiquiti and their UniFi kit, I’d try their UniFi Video Camera G3s and have thus far, been impressed with everything about them.
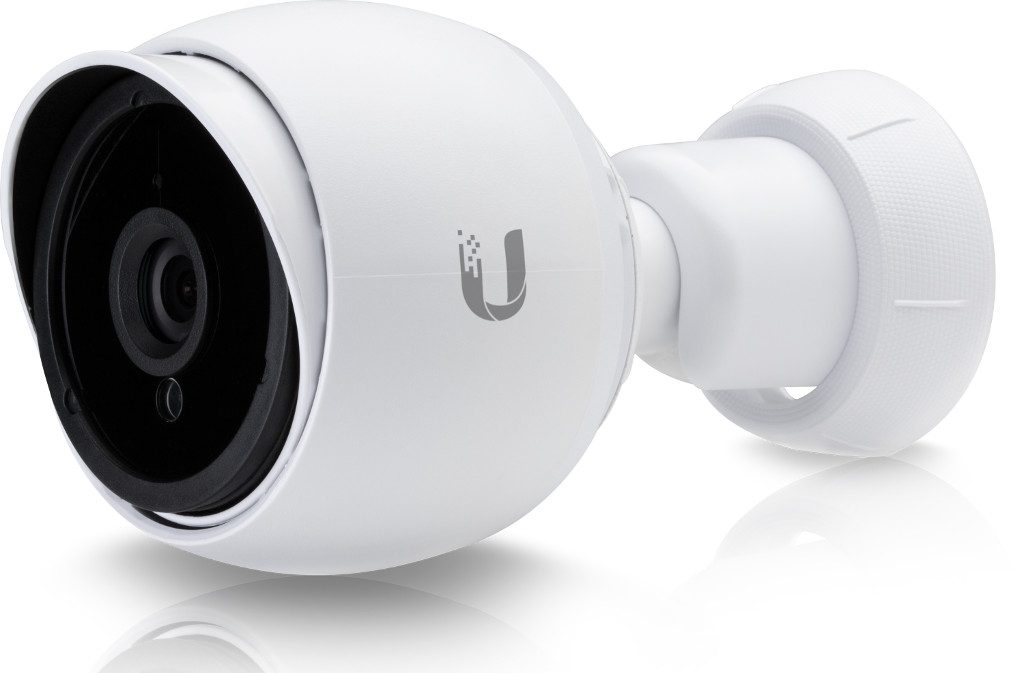
These are powered over PoE making them simple to install with just a run of ethernet cable (Cat6 in my case).
Instead of going for the dedicated UniFi NVR, I decided to build a custom box for this, consisting of a Dell Optiplex tower with an i5 processor and 4GB RAM. It has 2 HDDs inside, a Western Digital Blue 1TB as the main drive for the OS and software, and a Western Digital Purple 4TB designed for surveillance for the video storage.
This box runs Debian OS and UniFi Video for the software. It’s a great setup affording very flexible control over each camera separately if so desired. The quality of the video footage is very high capturing in 1920×1080 full HD, and has IR for night recording and also records an audio stream too.
The set-up
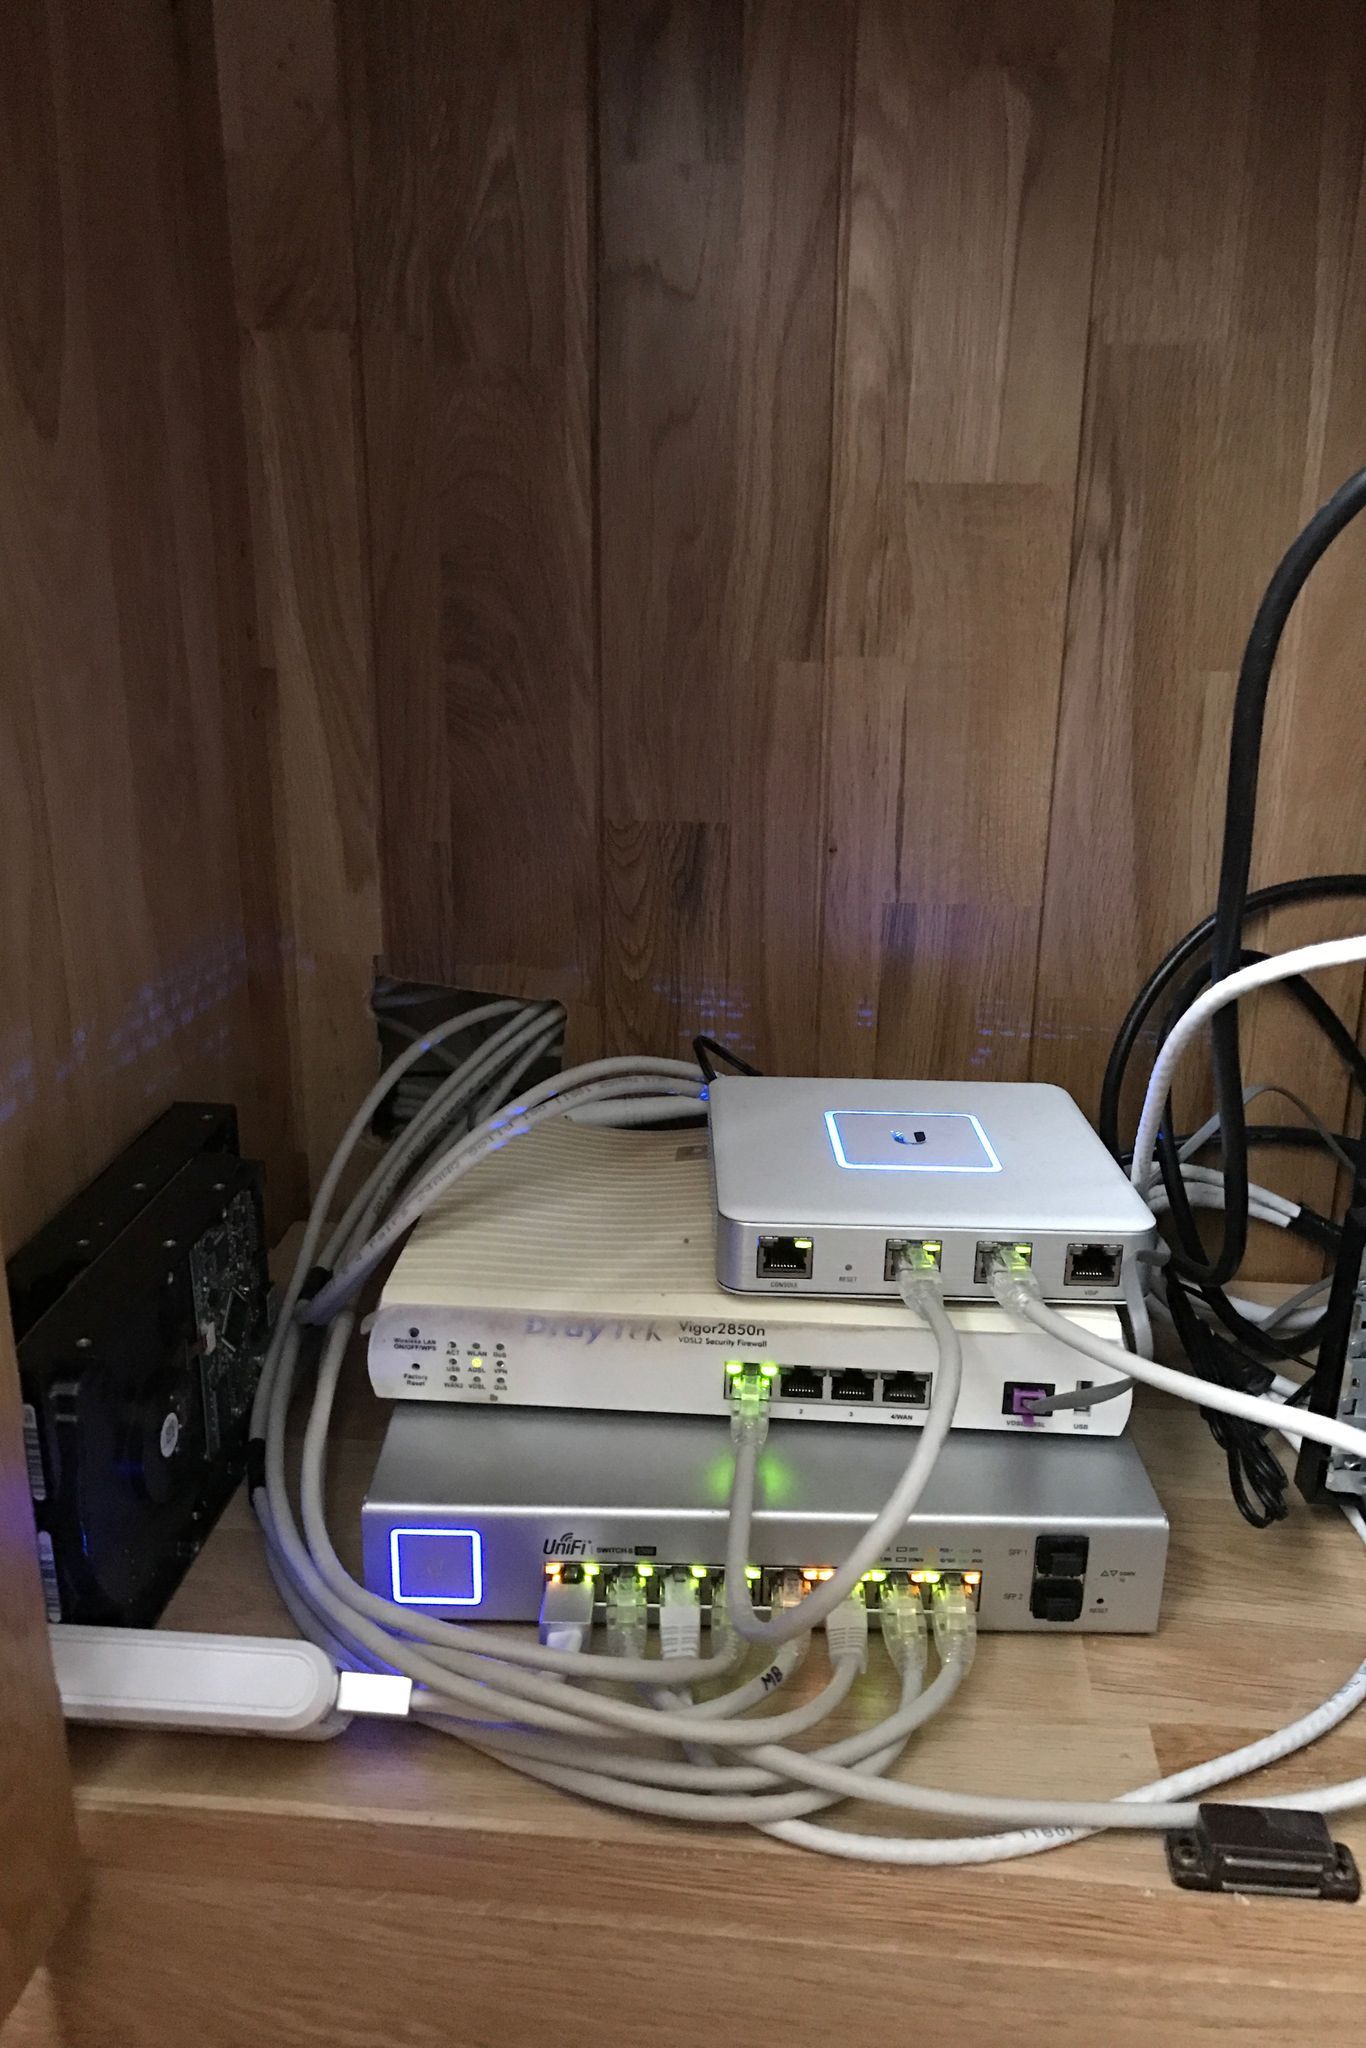
I currently have a “pro” internet account with Sky, which affords me a static IP address and my connection to the outside world is done via PPPoE. As I’m still using my DrayTek router as a “dumb modem”, I already had the login details for this. The DrayTek router is connected to the WAN port of the Security Gateway. Once that connection was established, I set about the internal network.
I decided to make up custom Cat6 cables for the network cupboard so that I didn’t have a lot of excess to worry about and to keep things nice and tidy.
The next connection to make was the Security Gateway to the 8-port PoE switch, closely followed by the Cloud Key so that I could start configuring everything. Before the configuration was started, I ran another length of Cat6 cable to connect the AC AP Pro access point. This currently resides on the top of a bureau in the front room until I’ve established the best place to fix is permanently for best coverage.
To start the configuration, I added the Ubiquiti Device Discovery Tool app to my SRWare Iron browser. Once the Cloud Key was discovered, I could log in to the controller and start making the changes I needed.
As I have rather simple requirements for my LAN, despite it being fairly large, I didn’t bother with setting up multiple VLANs, just started with the wired connections and static IP assignments.
Once the wired connections were sorted, I then setup my WiFi networks. These consist of 3 separate SSIDs but all under the same VLAN. This allows me to setup a wireless connection for myself and my wife, and separate ones for the kids that can have further configuration done (such as limiting the hours of availability for example).
The UniFi Controller
The controller software is in short, simply awesome! Light-years ahead of my DrayTek setup, highlight intuitive and fast. I won’t go into full detail for each of the pages, but here are a few screenshots of the main sections.
Dashboard
The dashboard offers a great insight overview of the general status of the network.

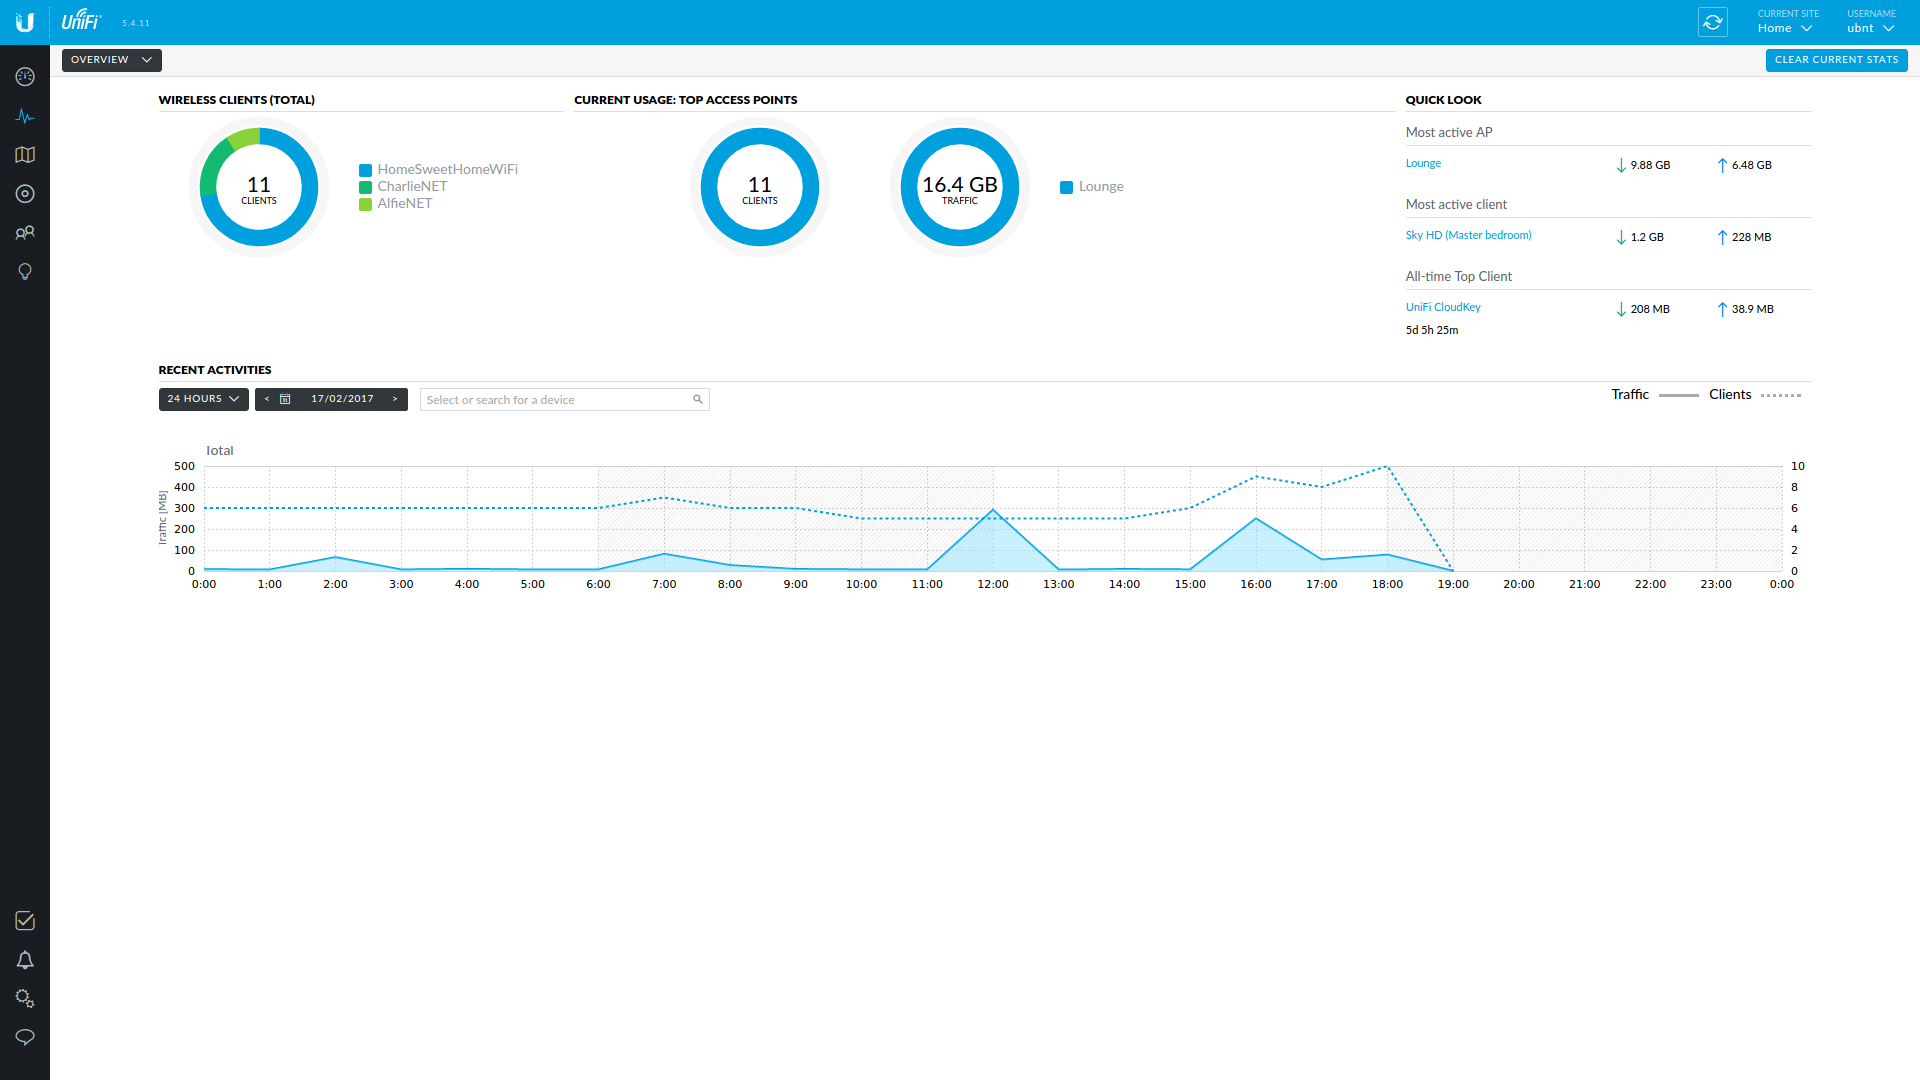
Statistics overview
The statistics overview page gives a nice generalisation of the current ins and outs of clients and data flow, but with Deep Packet Inspection (DPI) enabled, you can see a great deal more information from the traffic statistics page.
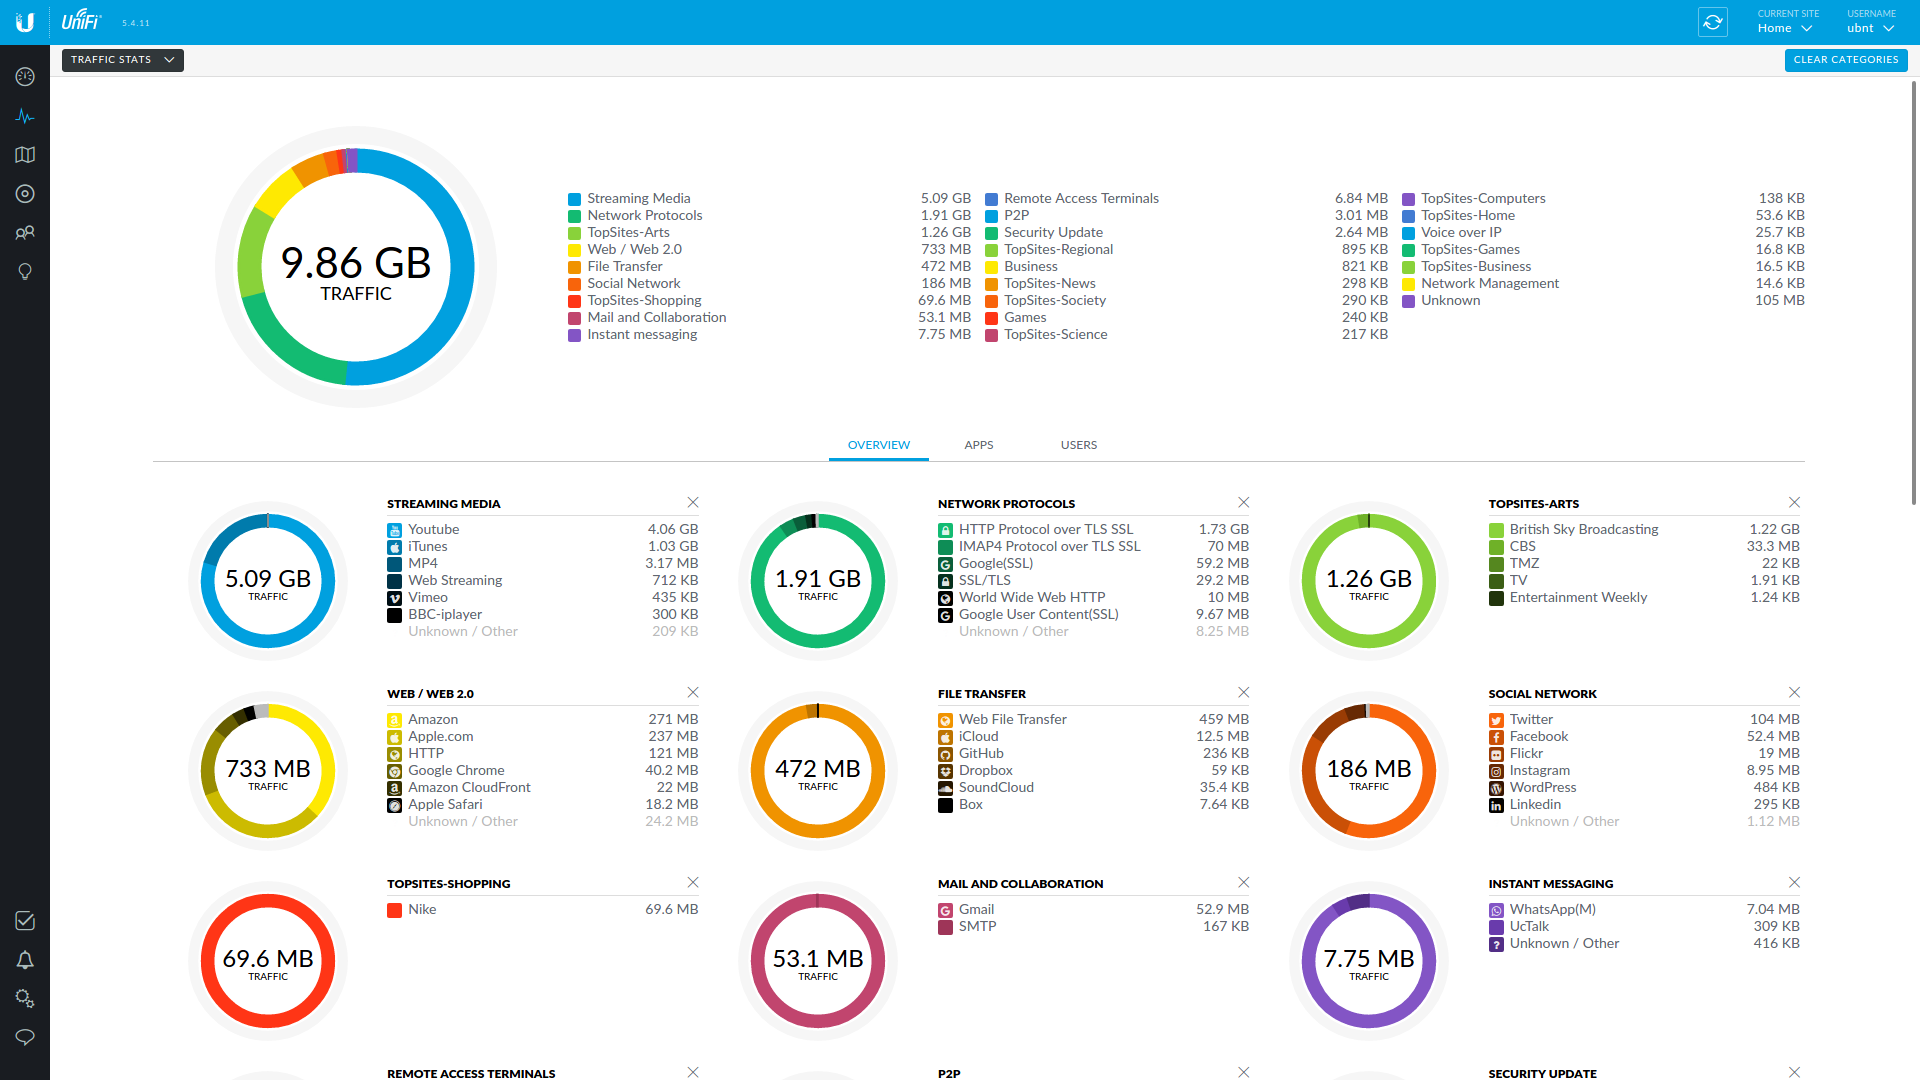
Traffic Statistics
With Deep Packet Inspection (DPI) enabled, you get a clear-cut view of data flow analysis, from both the client and what endpoint.
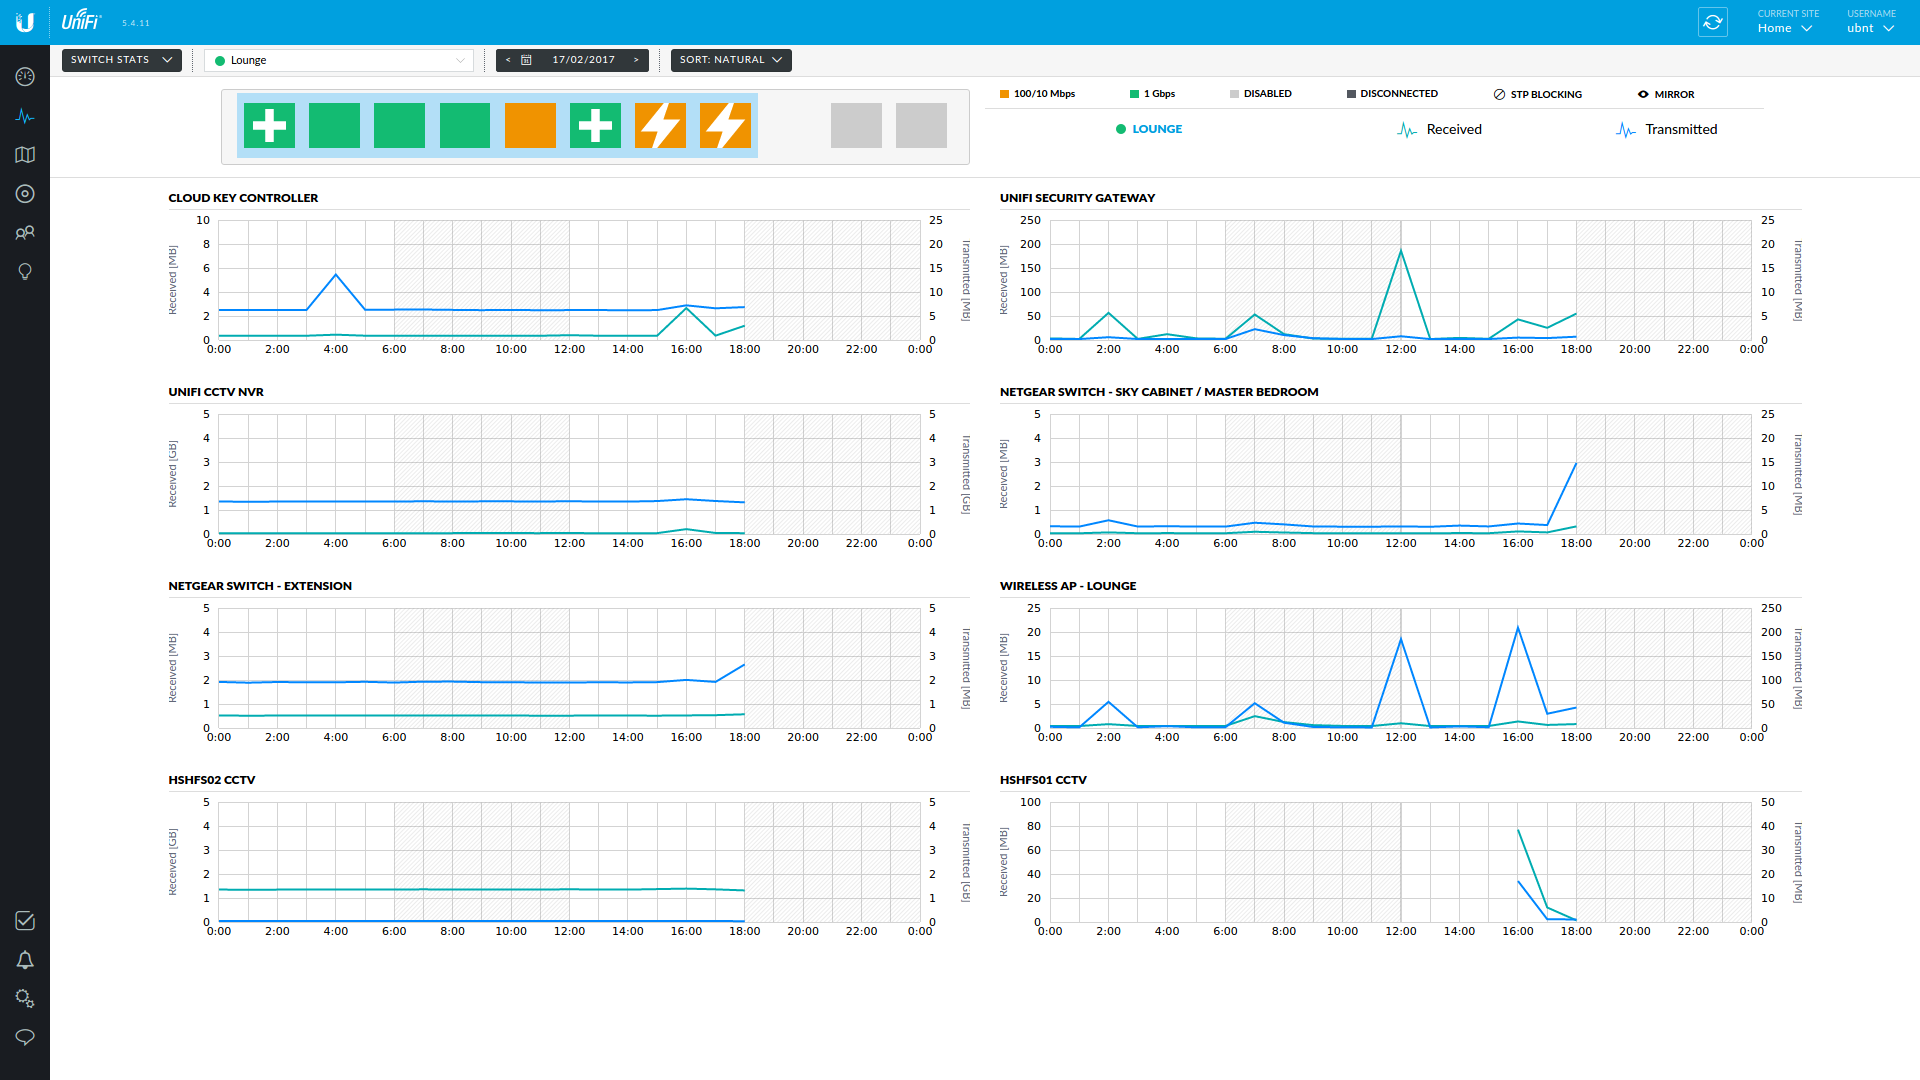
Switch statistics
As the switch is managed, you also get a great overview of the setup of this too. You can even drill down into each port to get extended information about the data and what’s connected to that port.
Map
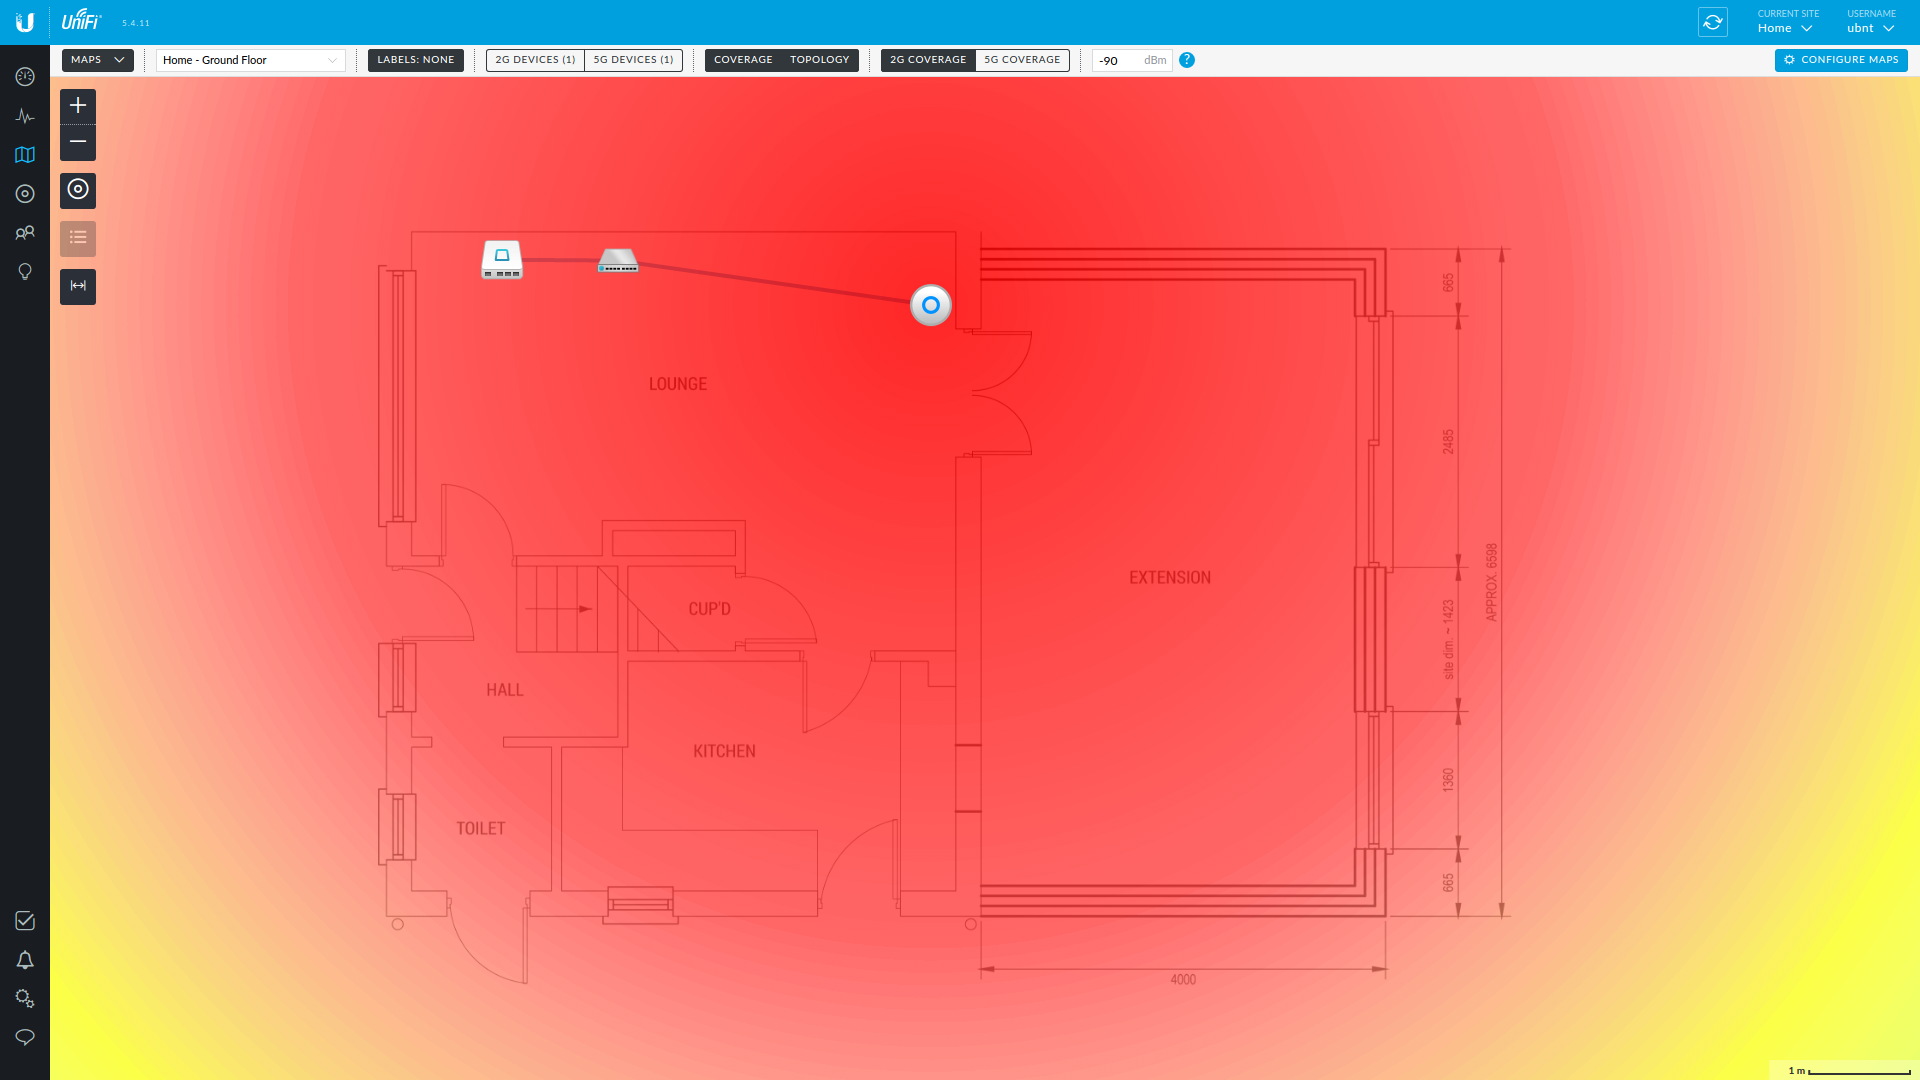
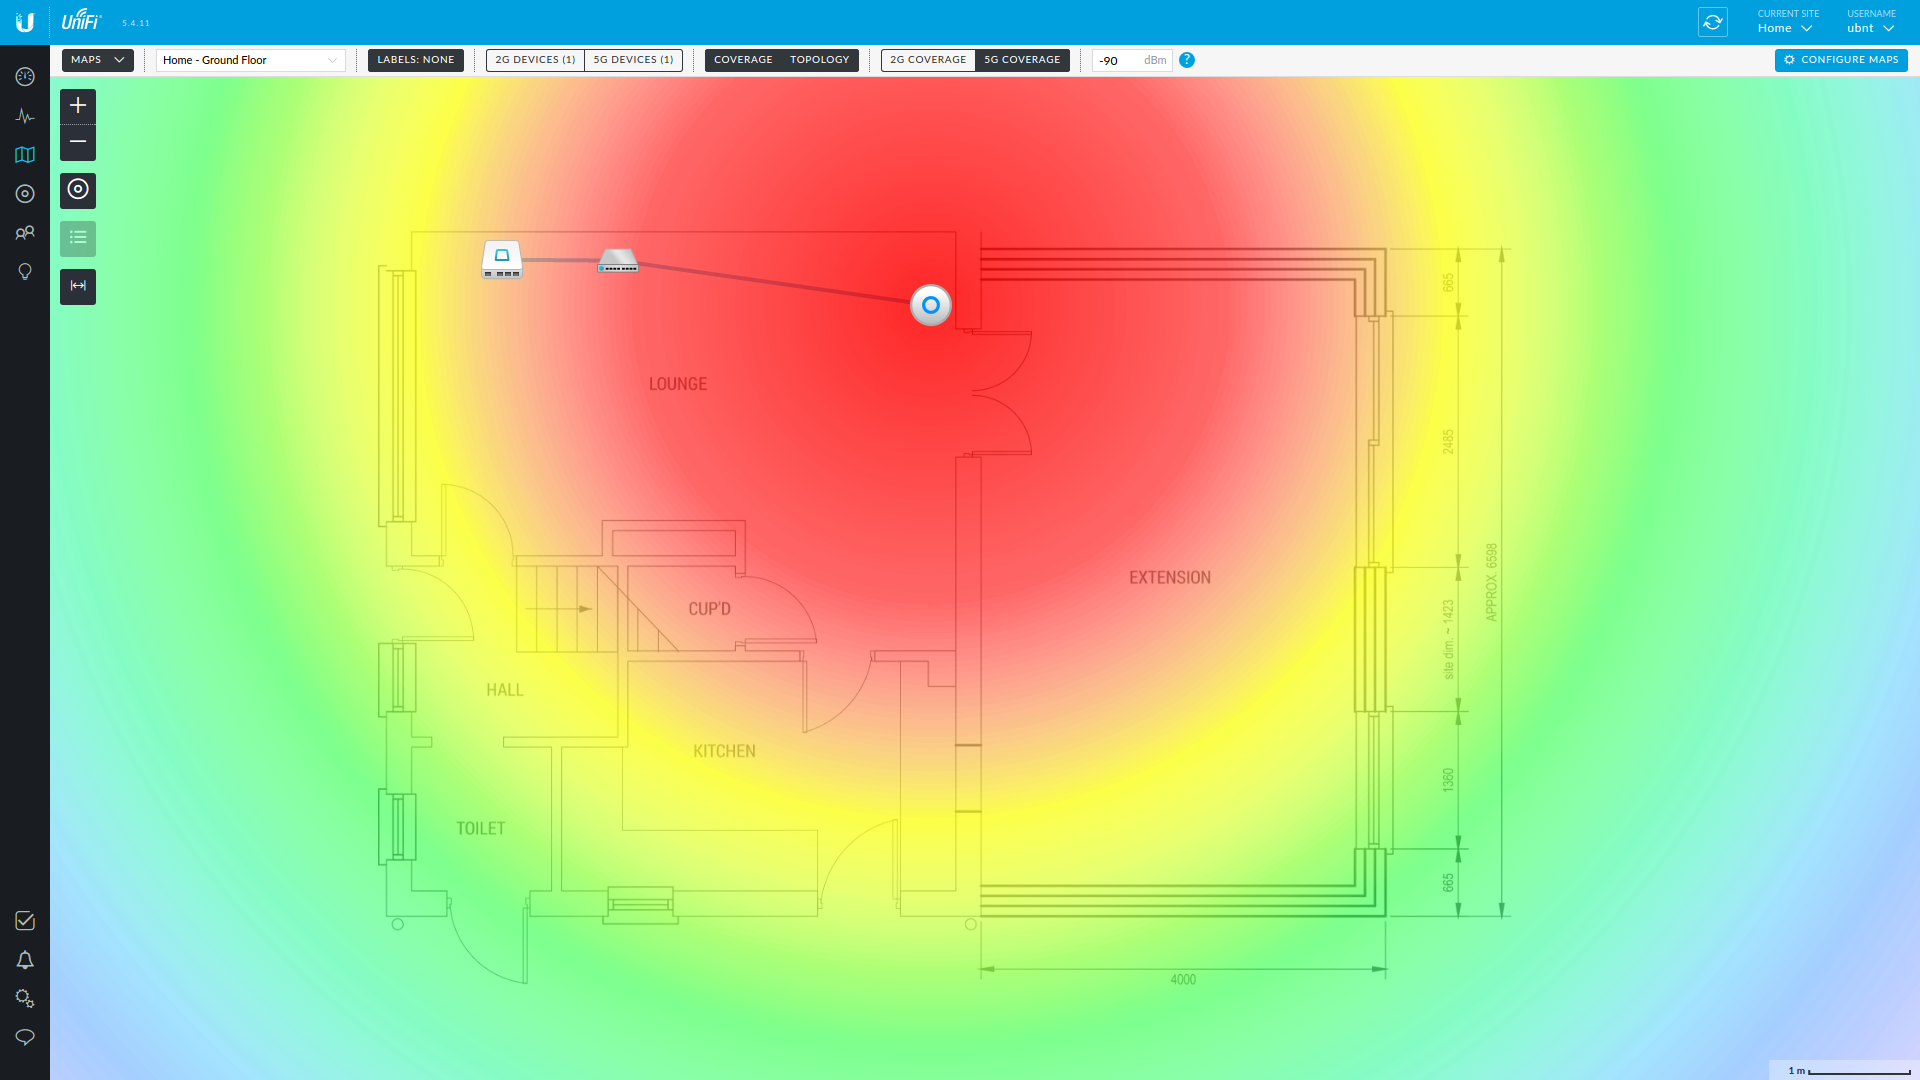
This feature may not be of much interest to some, or of easy set up, but if you happen to have a CAD drawing of your house, you can add the UniFi network components to your layout. Luckily, as I’d just had an extension built, I had drawings laying around for this, so added the ground floor and added the network components to it.
As I have the access point connected, you can also see both 2g and 5g coverage and help locate the AP(s) in the best possible locations.
2g coverage
5g coverage
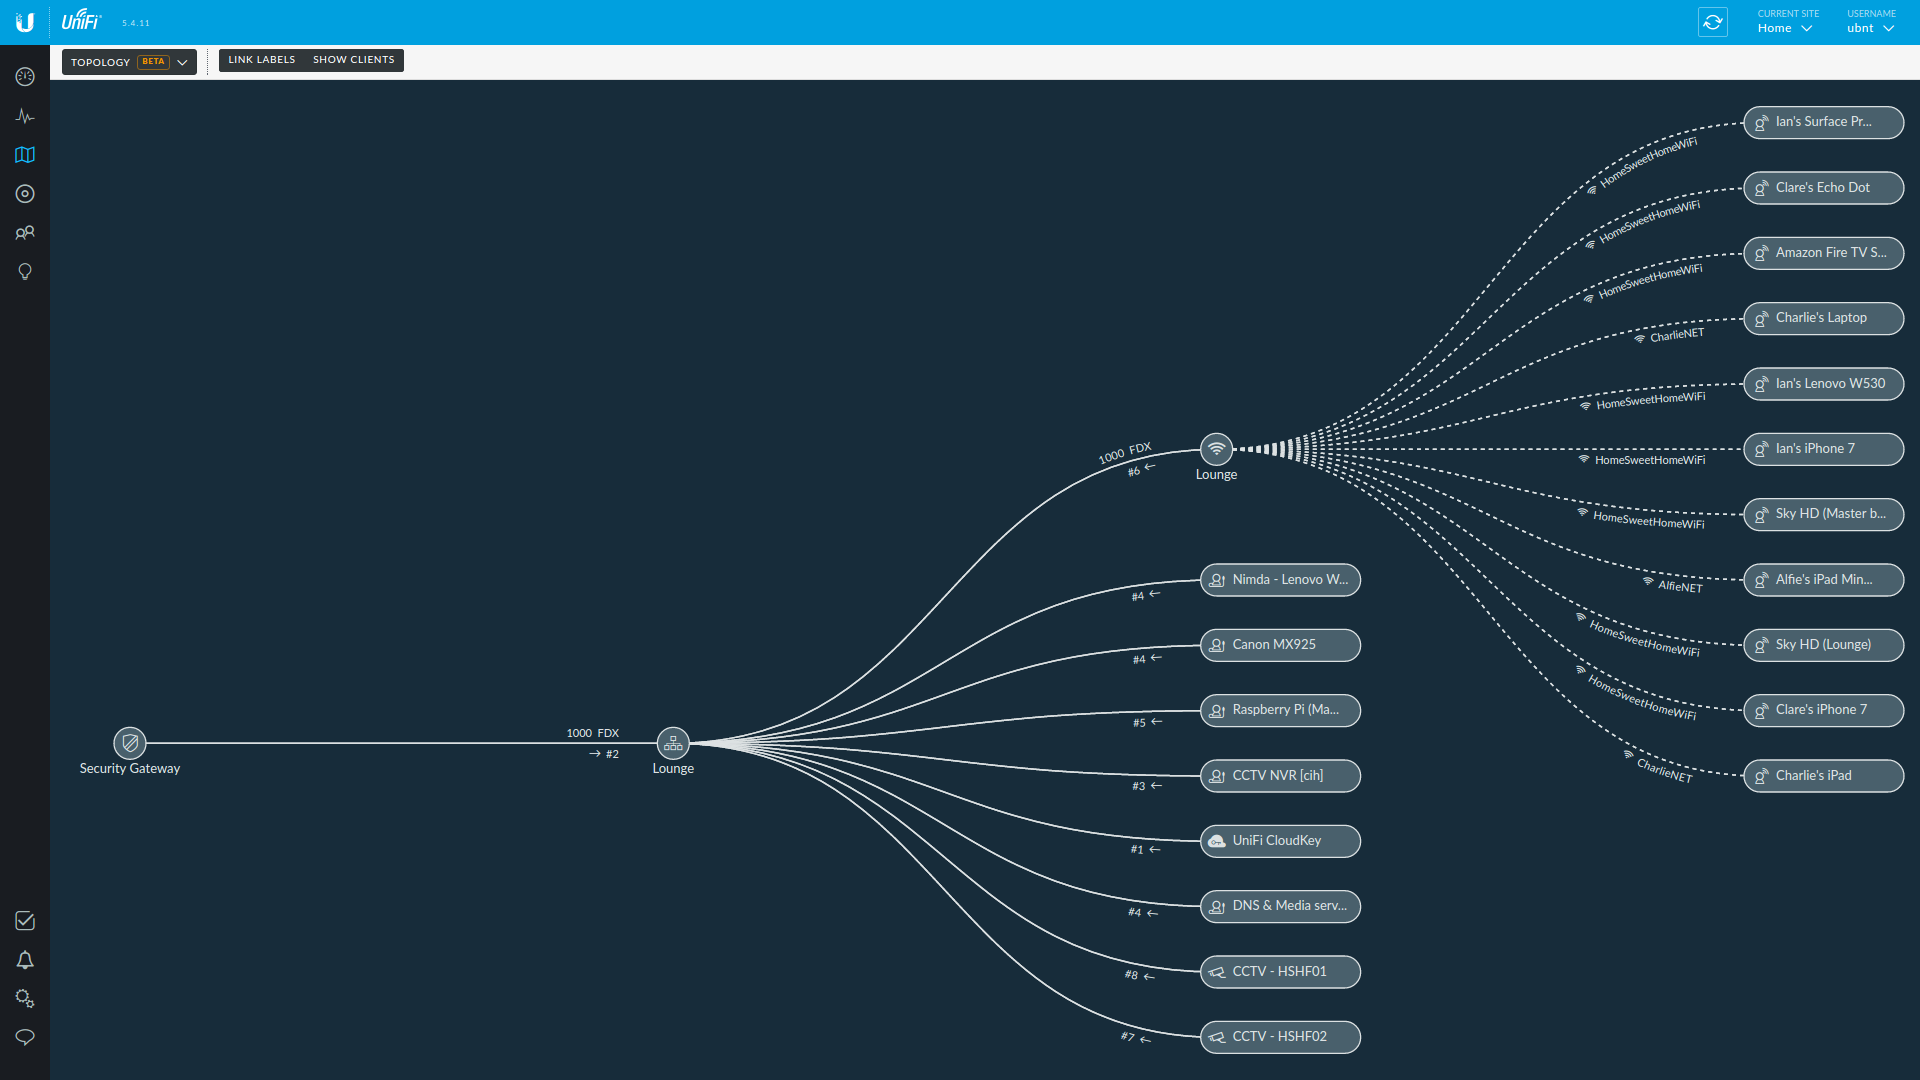
Topology
Alongside the component map and WiFi coverage, although still currently in beta, you also get a great topology view of all of the connected devices.
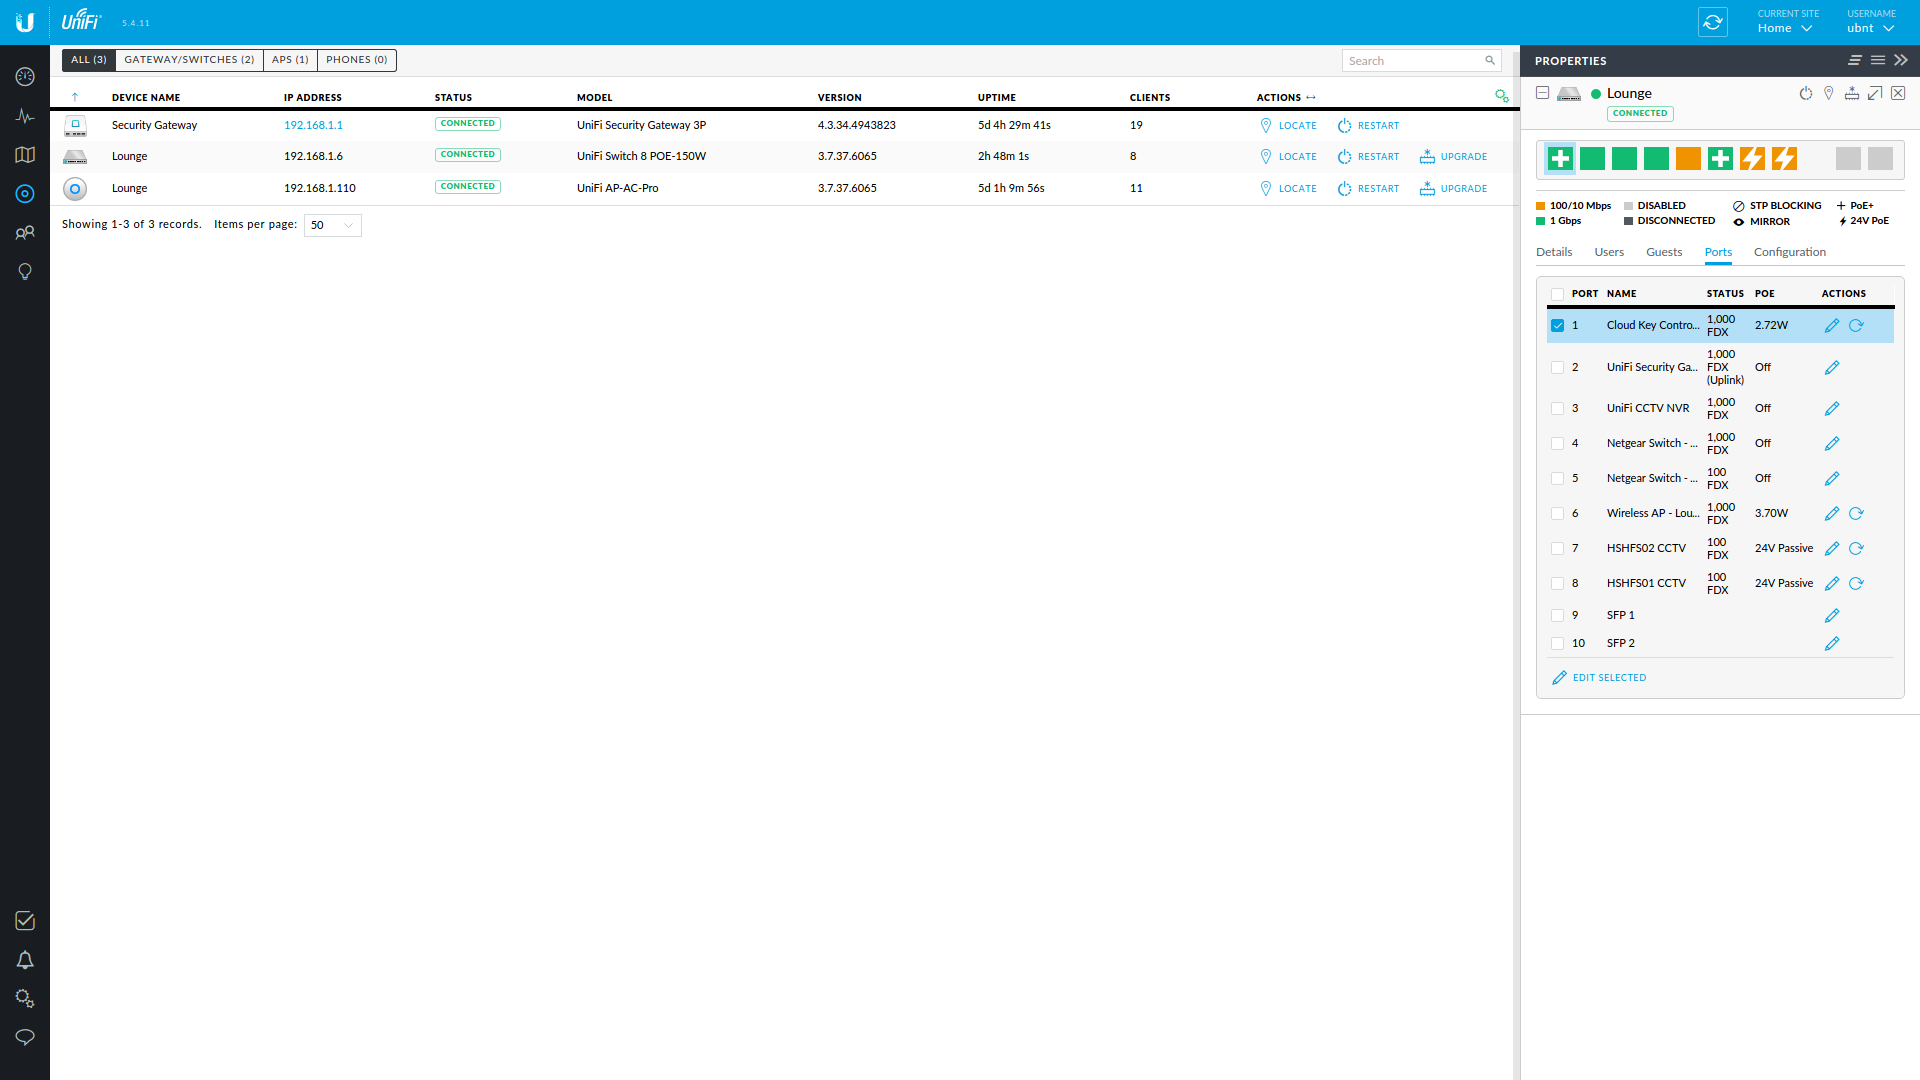
Devices
The devices page shows all of the connected UniFi devices on the network (not including CCTV cameras, which are represented as clients).

Clicking on any of the devices in the list will bring up a properties sidebar for that device.
Clients
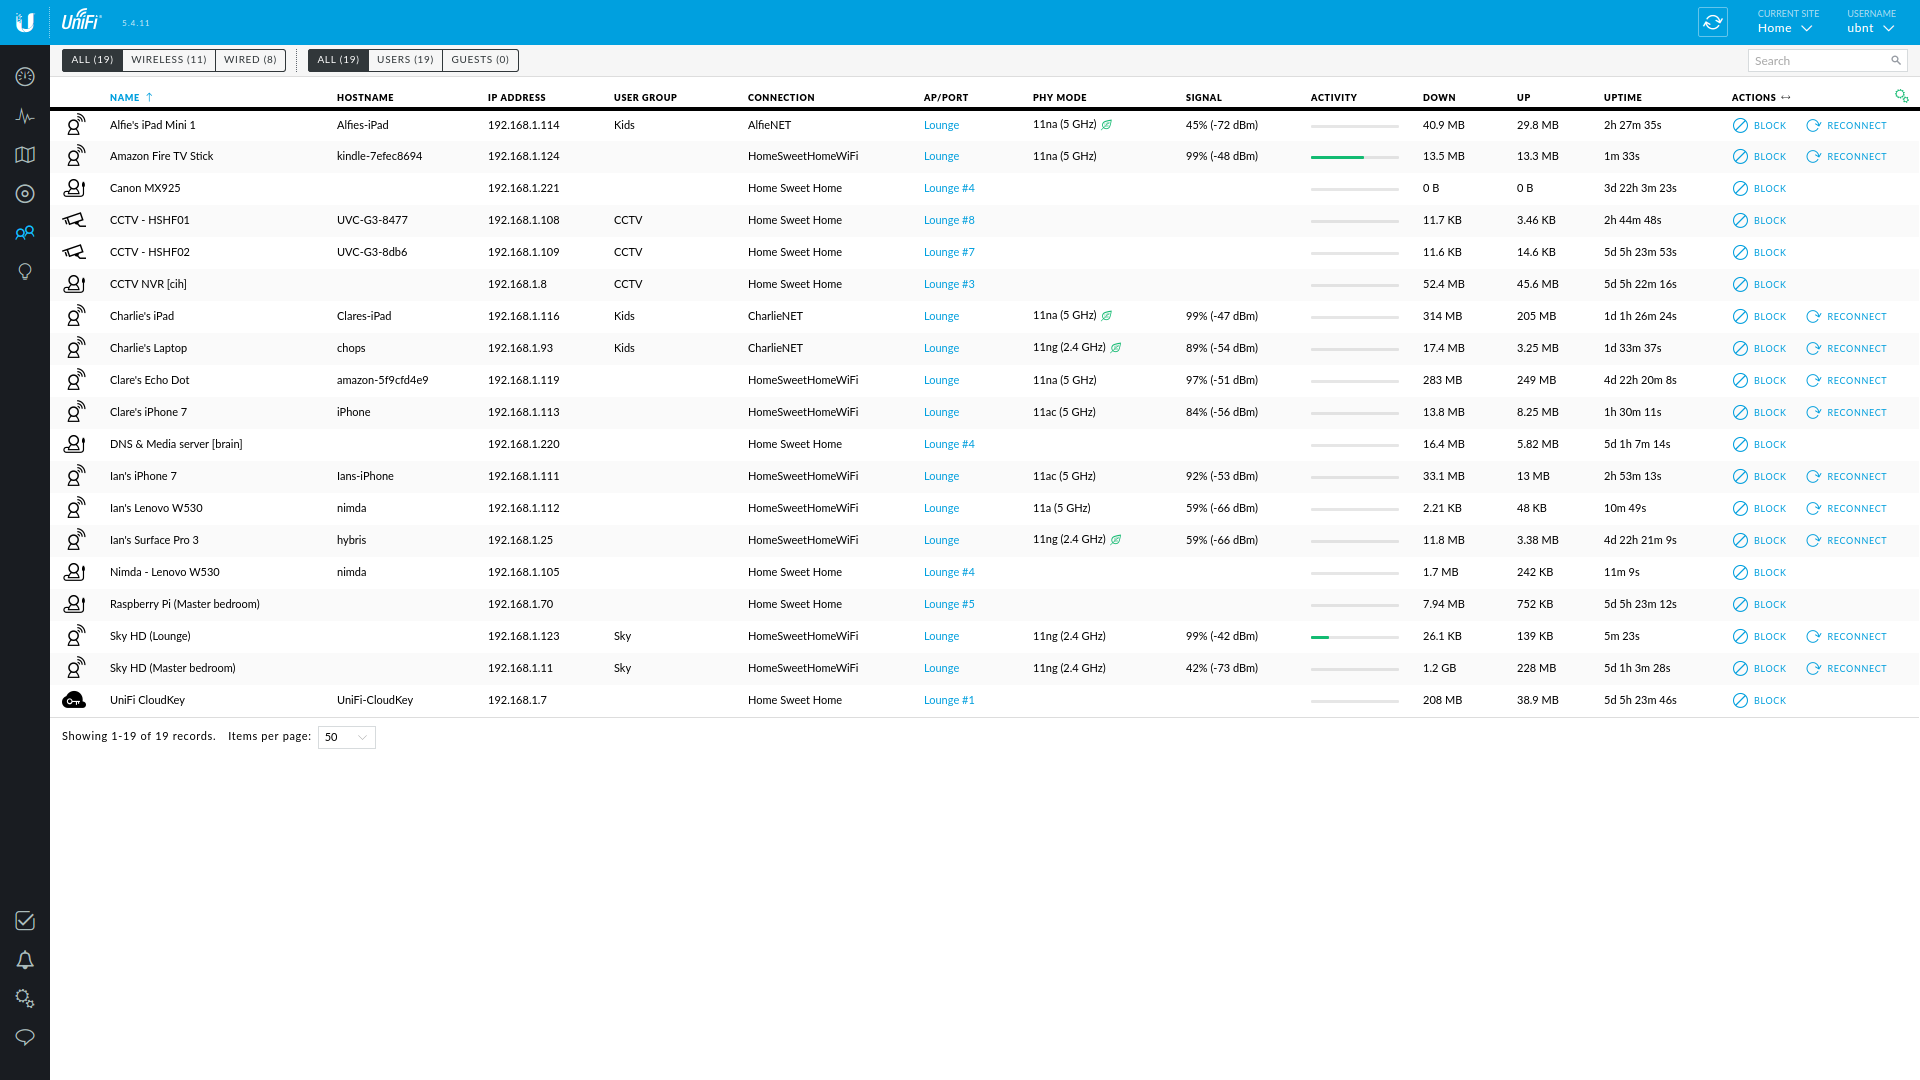
The clients screen shows you a complete overview of all connected clients, wired and wireless. Clicking on any of these will display the properties sidebar for the selected client which has further configuration, such as alias, WirelessLAN SSID connection and more, including some DPI info,
Conclusion
I’m extremely happy with the UniFi setup I now have. Both the configuration / “geekiness” of the setup for the home, plus the performance. I have much better WiFi coverage than I had previously with the DrayTek all-in-one (although I’m planning another AC AP Pro for upstairs too to boost the performance there even though there is good coverage already) and it’s absolutely rock solid, which you would expect from higher-end gear.
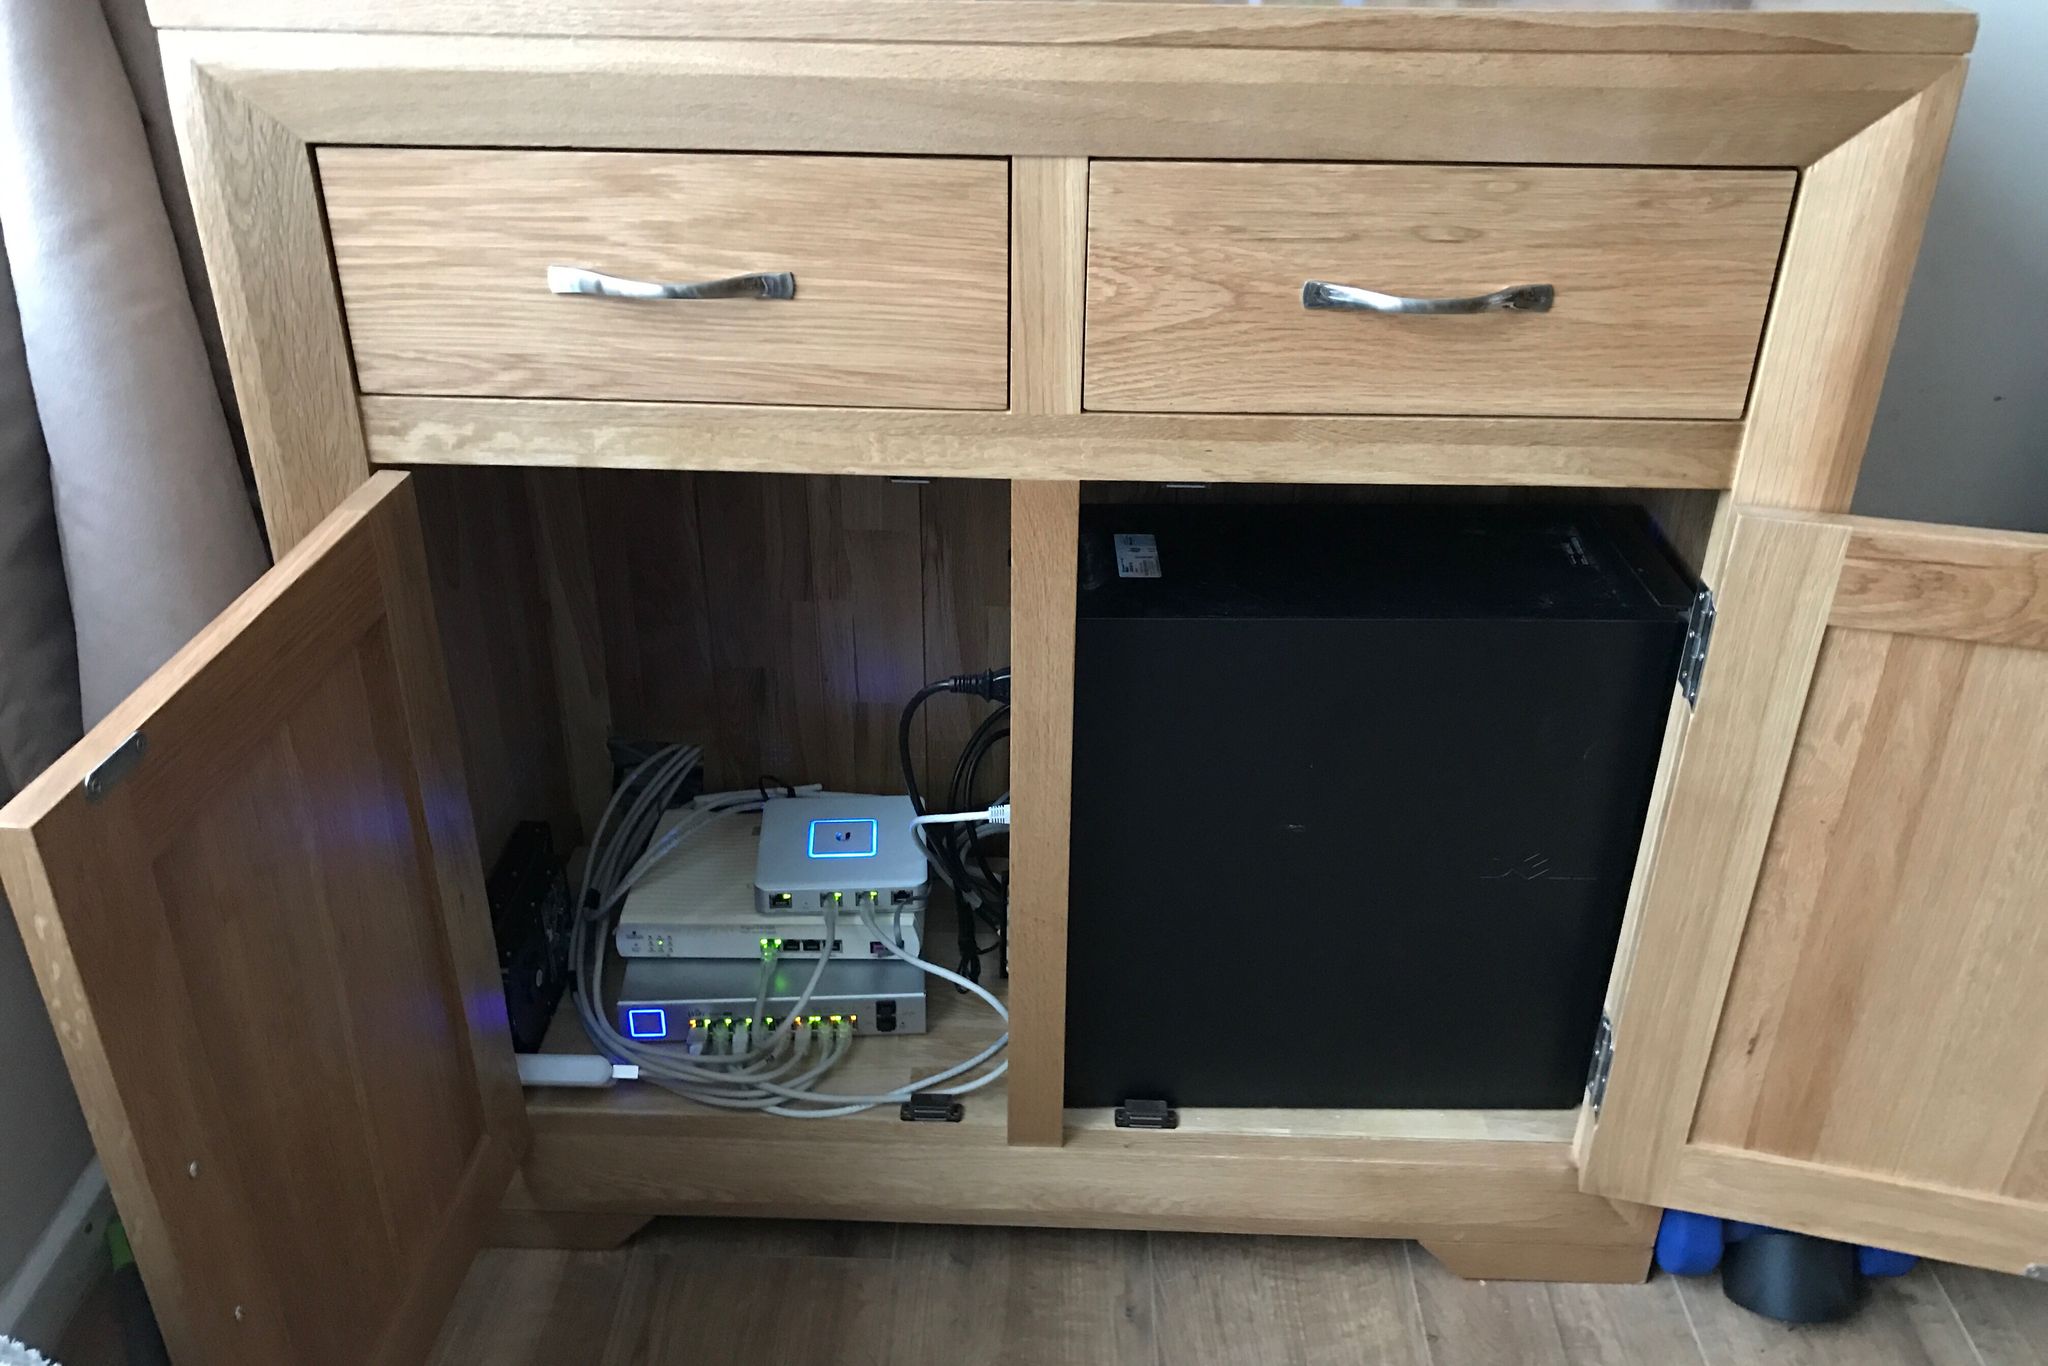
Even my wife is impressed, to the point she went and ordered a dedicated solid oak cabinet for the UniFi gear and video NVR!
Is it overkill for the home?
Possibly, but so are most 4×4 vehicles that never see a grass verge let alone off-road situations.
Is it for everyone?
Probably not. Most people are probably “happy” with their all-in-one solution provided by their ISP. It allows connectivity for their phone and tablet and allows them to browse the net and send / receive their emails.
Was it simple to install / setup?
Oh yes! The hardest part for me, was running 100m of Cat6 cable around the house where the walls are all brick. The installation of the UniFi components is really simple, especially if you’re using PoE for the devices and the intuitiveness of the controller software makes it very simple to configure as the basics are there in plain sight, and anything more complex are hidden by default. I’m not saying Aunt Mavis would jump straight in and have a ball, but let’s face it, Aunt Mavis isn’t probably likely to have shelled out for this kind of setup either.. but as someone who is “tech-savvy”, I found it incredibly simple.
Would I recommend the UniFi to others?
Simply put, definitely! in fact, I’ve already had discussions with people at work about it who have also seemed interested in putting something together.
Yes, it’s not cheap if you compare it to either your basic ISP-provided all-in-one, nor is it compared to even my DrayTek Vigor, but it’s most definitely worth the outlay if you’re serious about your internal networking performance.
Do I have expansion plans?
I certainly do. My next plan is a 16-port 150W PoE switch, 3 more G3 CCTV cameras and 2 more AC AP Pro access points.
At this point, I was going to add the information for the CCTV / UniFi video setup I have too, but figured that deserved its own blog post. This should be up in the next few days.. keep your eyes peeled if that piques your interest too.
Update
I've now added a post on my UniFi Video G3 camera CCTV home setup for anyone who fancies a read :)